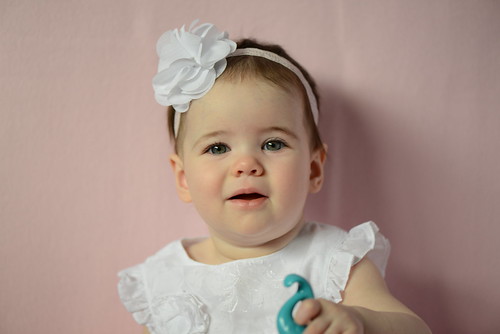
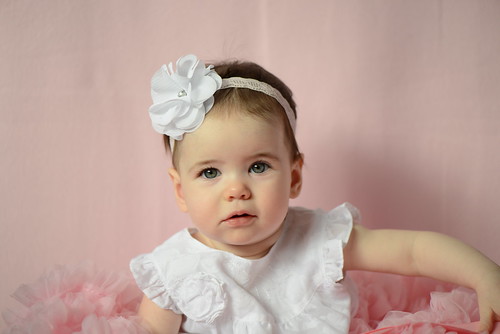
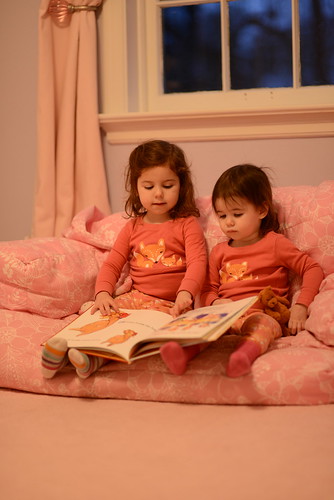
You guys, I am so excited for today's post. Over the last few months I've been getting so many questions about photography and lenses and how I take photos of my kid. Turns out there are SO many moms out there that desperately want to take better photos of their little ones, but just don't have a lot of "photography knowledge" to move their photos from average to awesome. Yeah, I'm talking about YOU, mama. Most of you already have a nice camera (DSLR), but have either been taking photos on Auto (that green square) or inside with bad lighting using the flash (NO!). If you're doing either of these things, it's no wonder your photos aren't turning out lovely as you'd like them to. And if you're not but still want to improve your pictures, you've come to the right place and are already ahead of the game.
So, I've decided to start a series of posts called "Photography for Moms" - all about how regular moms with regular cameras can start taking better photos of their kids without overwhelming you with technical gobbledygook or taking up a bunch of your time. I am planning to have guest posts from real moms that take beautiful photos of their kids and can give you easy ways to improve your photos without having to invest a lot of time, effort or money into photography. This is less about professional photographers telling you how they do it (with fancy gear, exact settings in full manual and editing) and more about real-life moms telling you what they do (with the camera they have) to get great pictures. And I don't mean dumbing things down for you (because I already know that if you're reading this blog, you're brilliant), but making the information relatable and giving you practical advice that you can use right away.
Today, I'm thrilled to introduce you to one of my real life best friends, attorney/scientist/blogger/photographer/mama extraordinaire, Jessica. You guys might remember her for taking the photos from
THIS post of me and Mac. Those pictures of some of my all time favorites. Jessica is a mom who fell hard for photography when her daughter Julia was born. I've had the pleasure of learning right along with her and watching her photos go from good to great. She's now got two gorgeous daughters to be her models and I just love seeing her pictures of them. She's hoping to someday "go pro" with her photography, but for now she's focusing on growing her portfolio and her skills, both of which she blogs about
HERE. I love her posts because she's so honest and not afraid to talk about how nervous she is taking photos for other people, how her practice shoots go and when/why something didn't work. Also, she's so kindly volunteered to take some maternity/belly shots of me in the upcoming months, so stay tuned for those!
Her post today is awesome and one of those posts that gets right down to the absolute basics of photography without getting technical at all! You could be using your iPhone to take photos and this tutorial will drastically improve your photos, guaranteed. No fancy equipment or complicated settings necessary. It focuses taking photos indoors with natural light and how to make it work best for you. Jessica does a great job at giving really great descriptions of what works and doesn't work and how to make bad situations better. If you guys are still stuck inside (like me) due to freezing temperatures and snow, this posts gives you something to do! Practice with these settings, play around with the light, try it out. Seriously, read this tutorial then go grab your kid, give them a book/iPad/doll, stick them by a window and take some photos of them. You're going to be blown away at how much better your pictures look. So, without further ado, here is Jessica!
Hi everyone!
I'm so honored to be posting on Sara's blog today!
I used to be an attorney, which is how I met Sara - we were at the same firm way back in the day. I was on my way out when I got pregnant with my first, and I've been a stay at home mom since. Now I have two girls, Julia (3) and Lana (21 months), and I'm hoping to go professional with my photography someday. I got my first DSLR when Julia was a few months old, loved it, and then gave birth to a terrible napper, so I spent large chunks of my day taking pictures of my children to keep from going mad. I was so flattered when Sara asked me to put together a photography tutorial. I can be my own worst critic, but after five child-years of badgering my girls with my camera, I've seen a major improvement in my photos. I'm still learning, every day and with every set of photos I take, but the more I take the more I notice. I'm hopeful that some will find this helpful. I'm also blogging over at
http://jessicaglunt.zenfolio.com/ about my "adventures" in trying to get a photography business up and running. I hope you'll stop by.
When Sara first approached me, I knew immediately that I wanted to discuss indoor portraits. It's winter and we're all stuck inside a lot, but that doesn't mean we want to shelve the camera until spring. While I focus mainly on babies and children, the same principles apply to adults (and pets!). Most moms don't carry around extra flashes, and most rooms have one main window, so I'm going to talk about taking pictures of your child using natural light from a single window. Southern facing windows tend to get the most sun, especially in the winter (and is what you'll see in these photos), but you work with what you have; in our last house, a large western facing window ended up giving me the best light in the afternoon.
Photography tutorials inevitably talk about light; I've read, "Pay attention to the light!" ten thousand times. But when I was starting out, I'd wonder what exactly that meant. I was always chasing a child and never felt like I had a chance to experiment with this "light" of which they spoke. So today, I'm going break it down. A lot. I'm wordy. I apologize.
Also, all opinions here are my own. You decide what you like best, for yourself. Everyone has different tastes, opinions, and different constraints when they're taking pictures. These are merely my thoughts and if yours are different, that's okay!
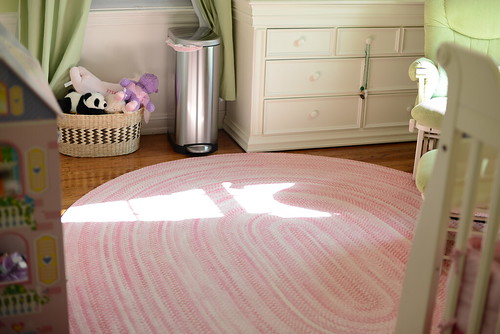
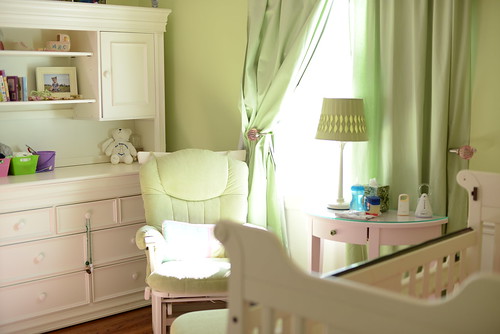
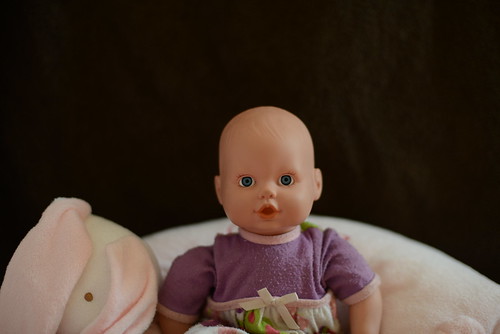
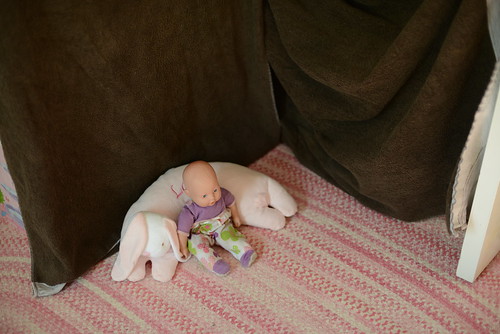
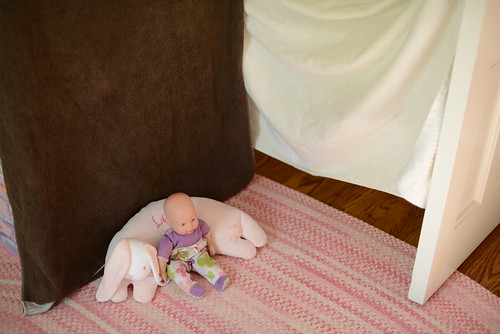
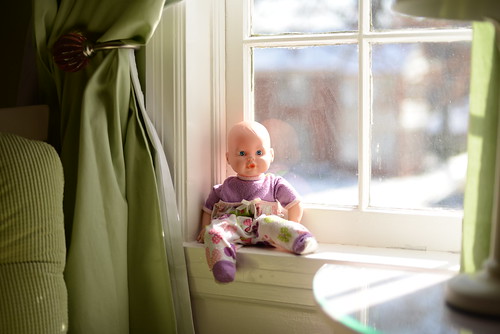
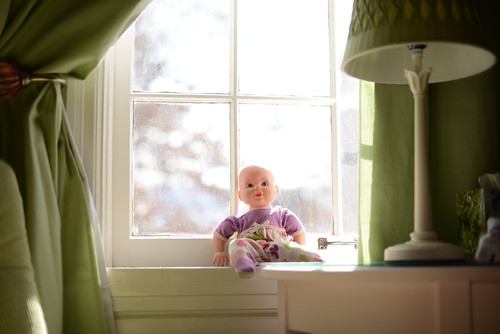
These were taken in my daughter's bedroom because her room was passably neat and for the single, Southern-facing window. When I took these photos, the window was the only source of light. It was midday, so the sun was pretty harsh. I used a Nikon D800, 50mm lens, ISO 200, f/2, and 1/200, unless otherwise noted, with Auto White Balance. Exposure will differ throughout these photos because I tried to keep my settings the same as much as possible so you can see the differences in light. My subject is Baby, for her unique ability to sit still for longer than 2.3 seconds.
Here is the set-up:
(f/2.5, 1/200)
(f/2.5, 1/200)
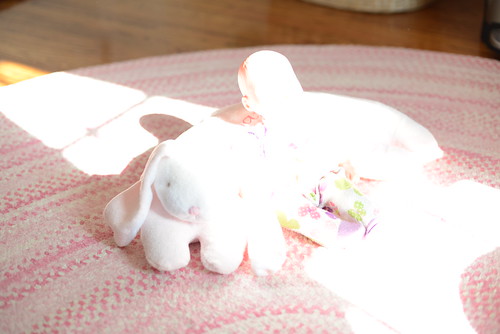
See how most of the room is properly exposed, but the areas in direct sunlight are completely white (blown out)? With the sun so bright, your camera's sensor isn't able to capture the scene's entire range from dark to direct light. You can use this for effect, but it's not ideal for portraits.
(f/2, 1/200)
(f/9, 1/800)
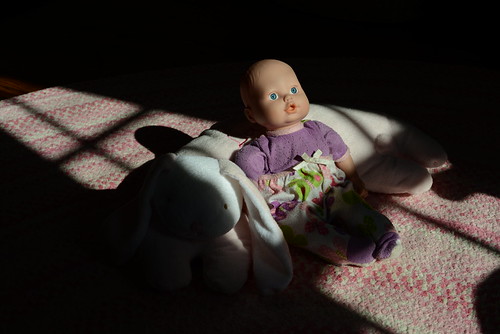
When your child is in bright light like this, you can expose for the background, or the subject, but not both. If you were outside, the entire scene would be as bright as the baby, and you wouldn't have this problem. But, you won't typically find that scenario indoors.
So… Light is good, more light is better, but direct light is difficult.
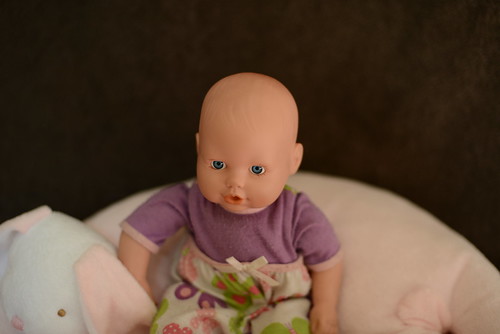
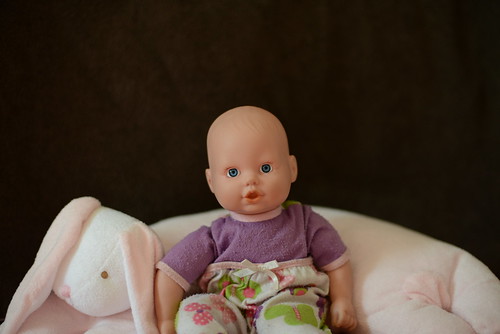
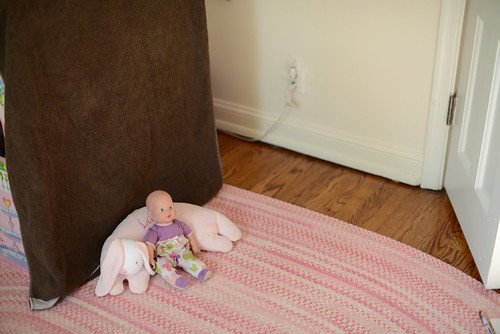
I threw a dark towel over a bookcase for a background and took Baby out of the direct light - just a few feet over.
(f/2, 1/800)
The window is behind me and over my right shoulder. Notice the shadows on Baby's face: her chin, bottom lip, and under her nose are all defined, along with a slight curve of her forehead, courtesy of the light being higher than her face. The right side of her face is in shadow, which is a little undesirable, but the shadow on the right side of her nose (Baby's right) helps give her face some dimension. Light straight on can flatten a face: some shadow helps define a person's features, but too much can be distracting - most of my photography struggles with finding the middle ground between those two. Also notice the lights reflected in Baby's eyes - catchlights - which are typically thought of as positives, helping the eyes look alive. Your subject's eyes will reflect the light source; you can see the window light and the splash of light on the floor. Honestly, I don't usually worry too much about capturing catchlights when I'm shooting, but it can help you dissect your photos later on, and an awareness of them could influence how you position your subject.
An aside - be aware of your own shadow. When the room is bright, it can be easy to miss it if you're moving a lot and come between your subject and the light. Here, I didn't change settings, but I moved so I cast a shadow on Baby. It's not necessarily going to ruin your photo, but it's definitely something to keep an eye on. You don't want to suddenly underexpose, and you really don't want the outline of your head across someone's face.
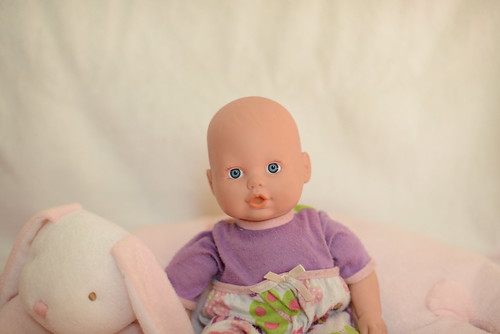
Now, I threw a white towel behind Baby. I didn't change anything else.
Look how much brighter the right side of Baby's face looks, just from the light bouncing off the white towel and around her. Reflected light can be really powerful in rounding out a child's face. In my book, this is an acceptable amount of light vs. shadow on Baby's face, whereas the photo with the dark towel had too much shadow. Here's a side by side:
Also note the shadow that Baby throws on the white towel. I try to have my kids take a few steps away if they're standing right in front of something so there's not a shadow right behind them. I think a noticeable shadow is distracting, and eliminating or softening it generally makes the photos look more professional. Here's an older photo of Lana, right next to the background:
(ISO 1000, f/3.2, 1/200)
And here she is, just a little further away.
(ISO 1000, f/3.2, 1/200)
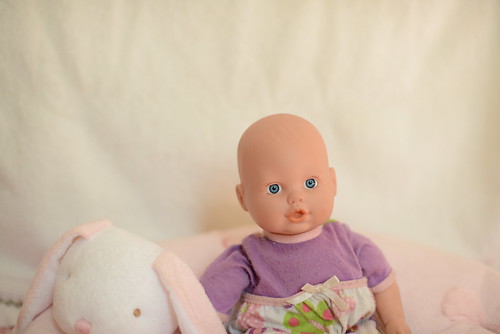
See what a difference that makes? Anyways, back to Baby. I put the dark background back and spun the setup ninety degrees to the right. The window is now to Baby's left.
Her whole face is a little darker now because the light isn't hitting her straight on anymore; the exposure is easily fixed either by adjusting your settings while shooting (which I did not), or later in post-processing - this happens all the time with fast-moving kids. See how there aren't any catchlights because she's facing 90 degrees from the light source? Also see how the shadows are also more defined? When the light is more off to the side, or more one-directional, you're going to get patches of light on your child's face, like on Baby's nose, upper lip, cheekbone, and forehead. This would not be my preferred lighting. The wall to Baby's right was already white, so adding a reflector did very little to brighten up the right side of her face. Now I spun Baby to face the light more.
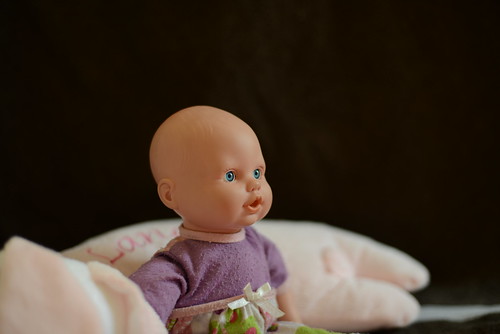
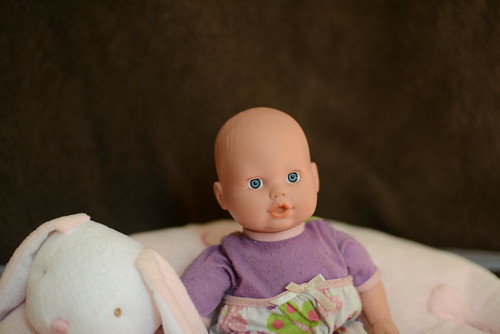
It's still a little darker than I would prefer but I really like the way the light hits her here. (I always err on the side of overexposing when I photograph people; it seems to smooth out skin and be more flattering overall.) The variation of light and shadow across her face really defines her features, yet isn't so great that part of her looks unpleasantly dark. The tough part about taking photos at this angle is the focus. You should always aim for the nearest eye, but the back eye often will be slightly out of focus. It's not a problem, really, but sometimes you just want the whole face to be in focus, and shooting at this angle can make that difficult. Here is Baby with her back to the window, with some light reflecting onto her from the floor, to her right. Again, it's too dark, but it's fairly even and her face is well-defined.
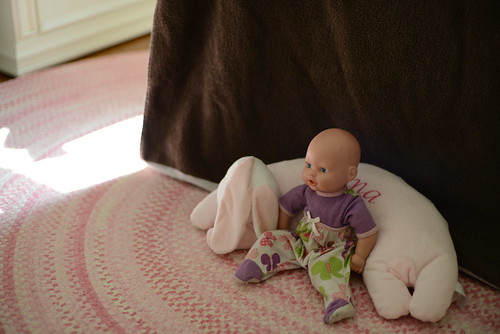
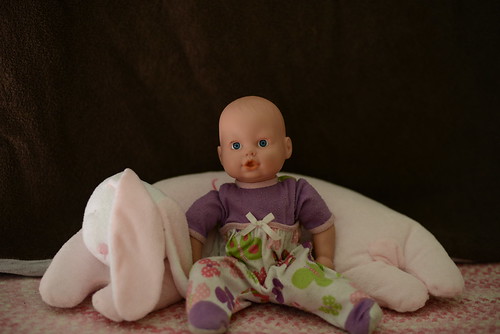
I spun her 90 degrees again, so here the window is to her right. The lower half of the walls in this room are white, so I figured they were acting as reflectors and evening out some shadows without me really noticing.
So I put another dark towel off to Baby's left, which would simulate the light-absorbing properties of darker walls, furniture, or even just empty space. Then I switched it out for a white towel.
Here are the side-by-sides (dark towel first, then light towel):
It's a big difference. Reflecting the window light, even using something as simple as a white towel, went a long way towards softening the shadows on Baby's face. You can use anything white - a wall, poster board, sheet, or a reflector designed for this very purpose. (I do own one but I wanted to show you that even a common object can really make a difference. Also mine was in the car and it was really cold outside.) If you use something light but colored, it will reflect that color.
So, all this is nice with a baby doll, but how to apply it to real-life children? (i.e., too long, didn't read: skip to here)
Put them in a well-lit room, keep them out of direct sunlight, and try to position them so the light hits them at a slight angle. Even if you don't see it when you're shooting, imagine the light coming into the room like a straight line from the window, and try getting your child to face generally in the direction of the light but somewhere between parallel and perpendicular to it. (I struggle with actually noticing the light well during a session, so I go about photo sessions more analytically than intuitively.) Use anything white to bounce some light onto the shadowed side of their face if you can. Another strategy is to line up: the window, something to block the light, your child (facing away from the window), and then your camera. It'll be darker but the light will be even.
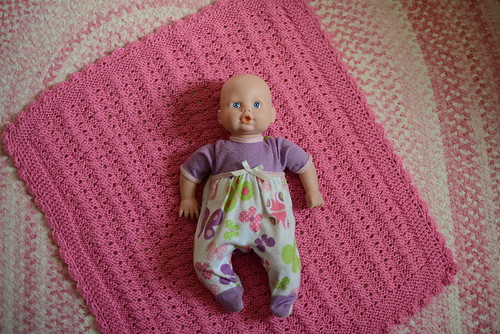
A quick note on babies, particularly those who aren't yet sitting well. Here are a few pictures of Baby on the floor, spun around so the light is coming from different directions. Here's the general set-up.
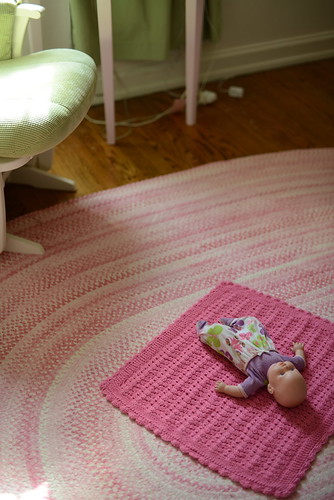
The window is at her feet. This is awkward. The shadows on Baby's face fall right under her eyes, and along with the shadows falling in a general "up" direction instead of "down" is unnatural to our eyes. Side shadow is nicer….
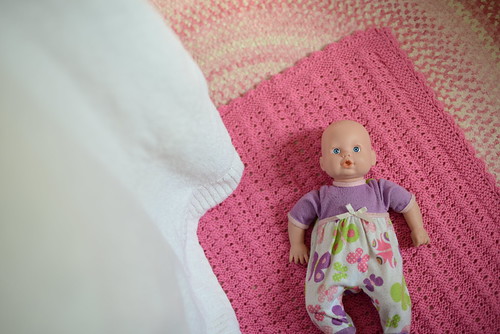
But adding a reflecting surface to Baby's right is even nicer.
Here is Baby's head towards the window, with a reflector on the darker side of her face. This also looks nice.
Reflectors are fairly easy to use with a baby since you're not chasing a mobile human, so take advantage of them to even out the light if you can.
Switching gears a little… So far this has been about "classically" well-lit portraits. You can also have a lot of fun with bright window lighting.
(f/2.0, 1/3200)
You can accept that part of the room will be too dark, but expose for your child's face. A child with actual hair, and not a bald baby doll, would have a pretty halo of bright hair around his or her face in a photo like this.
(f/2.0, 1/3200)
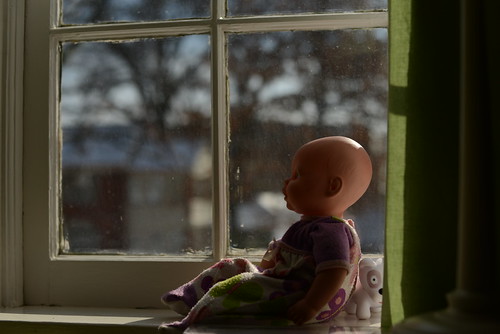
Notice how Baby's face is actually pretty evenly lit since her back is to the sun?
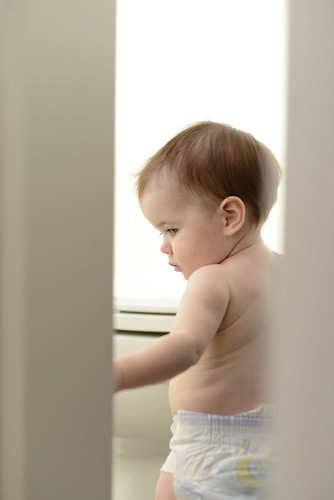
You can also expose for your child and let the light in the background blow out to white. I couldn't get a good picture of this with Baby, but here's an example I took earlier with Lana. I was shooting through a doorway into a bright room (ok a bathroom).
(ISO 640, f/2.2, 1/640)
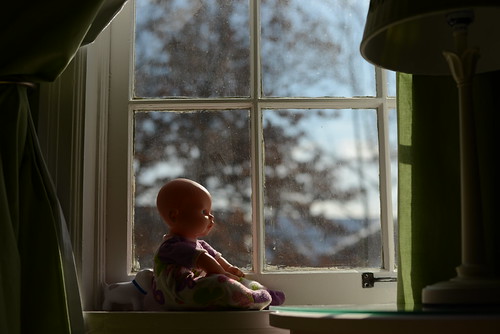
You can expose for the outdoors and throw your child mostly into shadow. Exposing for the outdoors can be a beautiful way to shoot straight in to the sun and capture your child's silhouette. It's not great here since the view out this window isn't much to talk about, but in general I love the sense of mystery and peacefulness that comes from a silhouette portrait.
(f/3.5, 1/8000)
(f/3.5, 1/8000)
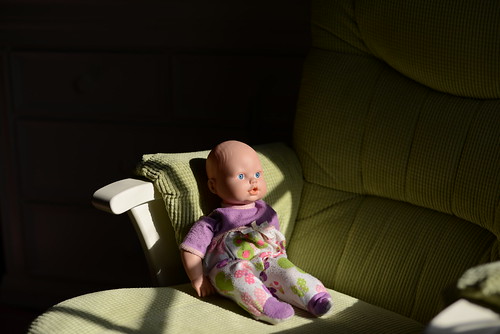
You can put your child in that patch of sun and let the background go dramatically dark.
(f/2.8, 1/8000)
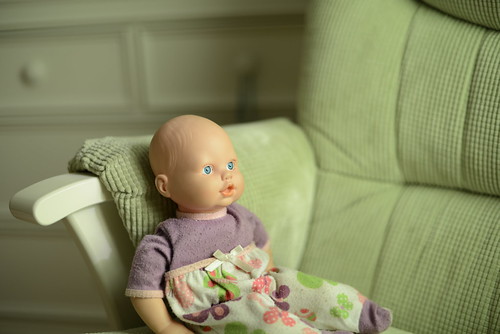
You can throw a sheer curtain across the window. (The curtain in this room is green and puts a green cast on everything. I'd recommend a white sheer - or even a white sheet - unless you plan to convert the photo to black and white.)
(f/2.0, 1/200)
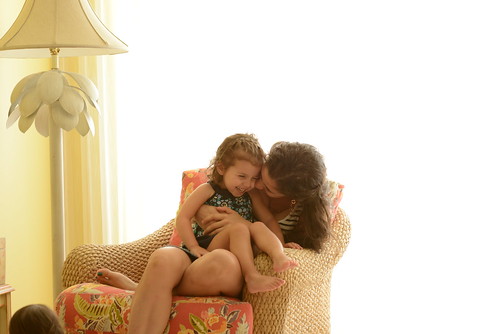
A sheer window treatment can really be beautiful to help diffuse bright sunlight so the light to dark variation within your image isn't so great, but it can also give you a blown-out white section where the window is, if that's a look you like. I really like it sometimes. Here's an example with bright sunlight coming in through sheer drapes.
(ISO 800, f/5.0, 1/80)
I generally do not turn on interior lights when I'm taking pictures indoors. The color of light bulbs is almost always different from the color of natural light, and even if it looks similar at one point, the color of natural light varies dramatically during the day. When you have light sources with different temperatures/color tints, it's virtually impossible to get your white balance right, making your kids' skin color look really strange. When it just can't be avoided, I have to take my images to black and white in post-processing to save them. Below is an example. The sun was setting so the natural light was very cool, and the room was dark enough that I needed to turn on the overhead lights and a lamp to make a picture possible at all. Now, there may be people better at Photoshop than I, but no amount of fiddling with white balance could eliminate the tint on the girls.
(ISO 500, f/1.4, 1/160)
And with that, my brain is empty. If you've stuck with me this far, thank you! I hope some of this was helpful or gave you some ideas. Indoor photos can be really tough, so really the most important thing is to not get discouraged. You're capturing your family's lives, and the photos will be precious to you regardless of how "technically good" they are.
Huge thanks to Sara for the guest post!
* * * * * * * * * * * * * * * * * * * * * * * *
Thank you Jessica for this awesome post! I hope you guys got some good advice and tips out of this. I'd love to get your feedback on this post and the series. In addition, Jessica has kindly offered to answer any questions you might have about the post, her settings or photography in general. You can also find her on Facebook at
Emma Constance Photography. Now go get your camera out and play!